Quick Start
This is a quick guide to get the Waterwheel agent running on your local machine and execute a sample QA task. The steps below cover macOS / Linux, Windows (PowerShell), and Windows (CMD). Use the tabs to pick your shell.
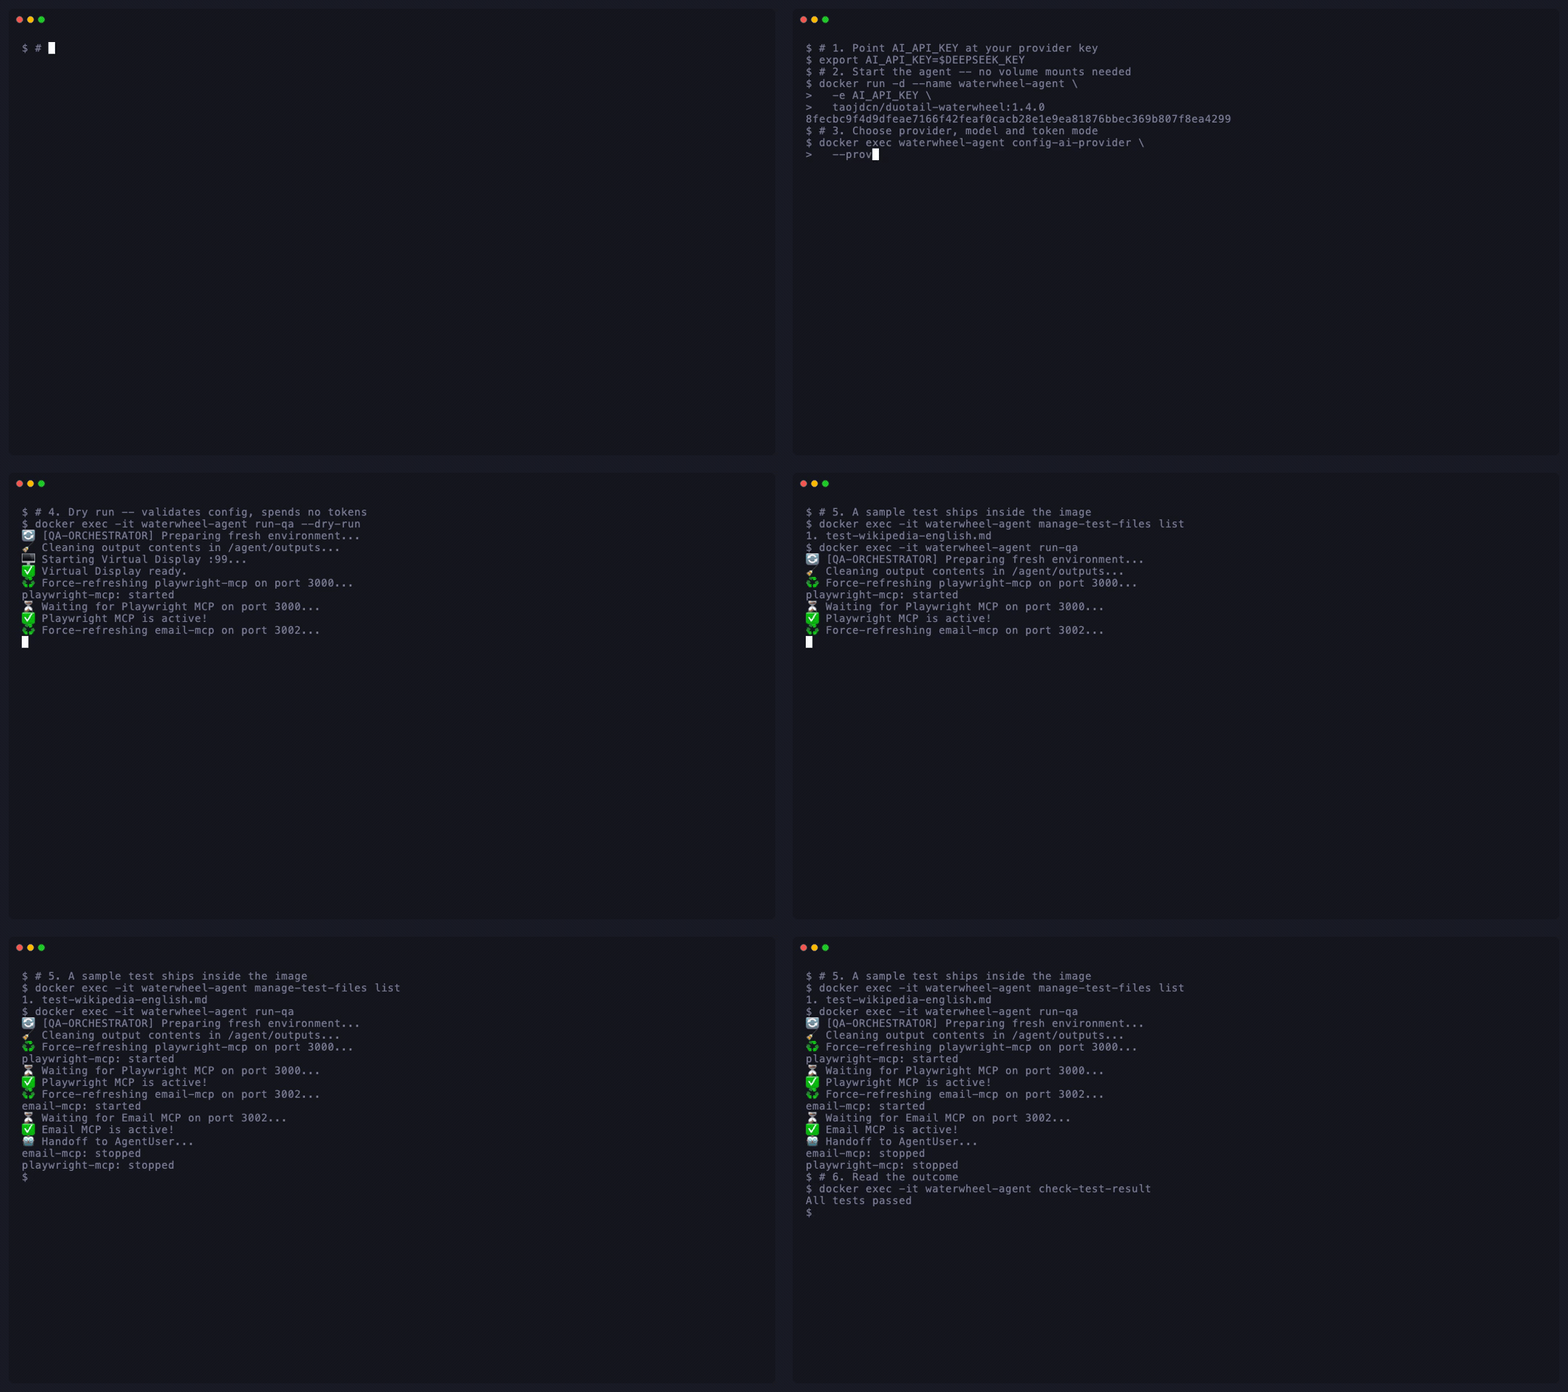
A real recording of the six steps below — from docker run to All tests passed
— against the 1.4.0 image. Idle waiting is sped up; all command output plays at
normal speed.
Only the host-side setup steps (setting environment variables and docker run)
differ between operating systems. Commands such as config-ai-provider,
manage-test-files, run-qa, and check-test-result are run through
docker exec and are identical on every platform, so those steps are shown
as a single code block.
This guide uses plain docker run and docker exec. Two alternatives are
available once you know what you need:
- Run through Docker Compose — mount your own instruction
files, tasks, and configuration from the host and bring the agent up with
docker compose up -d. Use this when you want the agent fully customized and reproducible. - Run through a code agent — install the Waterwheel skills into a code agent such as Claude Code and let it install, configure, and drive the agent for you in an autonomous test-and-fix loop.
What Is Shipped
The Waterwheel agent is shipped as a Docker image — a self-contained, read-only package that bundles the agent together with everything it needs to run (runtime, browser, and dependencies). Shipping as an image gives you:
- Platform independent — the same image runs identically on macOS, Linux, and Windows, so there is nothing OS-specific to install or configure.
- Easy integration — a single
docker runcommand pulls and starts the agent, and the image runs on any container platform (local Docker, CI runners, or container services like Kubernetes), so it slots into automated QA pipelines without environment-specific setup. - Your data stays in your environment — the agent runs entirely within your own infrastructure, and your test files and results never leave it: there is no Waterwheel-hosted backend. The only data sent externally is to the LLM provider you configure, and with a self-hosted
Ollamamodel even that stays inside your environment.
Prerequisites
Docker Desktop Application
The Waterwheel agent is shipped as a Docker image, so you need a container runtime to pull and run it. Install Docker Desktop for your machine from docker.com/get-started and make sure it is running before you continue.
AI API Key
The agent must connect to an LLM to perform QA tasks, so you need to provide your own AI API key.
Currently supported AI providers include Anthropic, OpenAI, Gemini, DeepSeek and Ollama hosted Gemma 4.
For simple QA tasks, you can use Ollama-hosted Gemma 4.
When using Gemma 4, you can use any non-empty text as the API key.
The agent uses your key the same way any standard LLM client does — as the credential on requests to the provider you configure. It is read from an environment variable inside your own container and sent only to that provider's API; there is no Waterwheel-hosted service that receives it. You stay in full control: use a scoped, spend-limited key, monitor the container's outbound traffic, and rotate or revoke the key at any time. If you simply want to inspect what's inside the image before committing a real key, you can start the container with any non-empty text as the API key and look around first.
1. Set Your API Key
Export your AI provider API key into the current shell session. The optional second line silences Docker's CLI hint messages.
- macOS / Linux
- Windows (PowerShell)
- Windows (CMD)
# Required: your AI provider API key
export AI_API_KEY=your_api_key_here

# Optional: silence Docker CLI hint messages
export DOCKER_CLI_HINTS=false
# Required: your AI provider API key
$env:AI_API_KEY = "your_api_key_here"

# Optional: silence Docker CLI hint messages
$env:DOCKER_CLI_HINTS = "false"
:: Required: your AI provider API key
set AI_API_KEY=your_api_key_here

:: Optional: silence Docker CLI hint messages
set DOCKER_CLI_HINTS=false
These variables live only in the terminal window where you set them. Run the
docker run command in step 2 from the same terminal so the key is
available to the container.
2. Install the Waterwheel Container
This pulls the image (on first run) and starts the agent in the background. No volume mounts are needed — the command line interface moves test tasks, instructions, and results in and out of the container for you.
- macOS / Linux
- Windows (PowerShell)
- Windows (CMD)
docker run -d --name waterwheel-agent \
  -e AI_API_KEY \
  taojdcn/duotail-waterwheel:1.4.0
docker run -d --name waterwheel-agent `
  -e AI_API_KEY `
  taojdcn/duotail-waterwheel:1.4.0
docker run -d --name waterwheel-agent ^
  -e AI_API_KEY ^
  taojdcn/duotail-waterwheel:1.4.0
3. Configure the Agent
Point the agent at the provider your API key belongs to. Pick your provider
below — each command uses the model we recommend in the
Provider Configuration Guide, together with the
token-efficiency mode.
- Anthropic
- OpenAI
- Gemini
- DeepSeek
docker exec waterwheel-agent config-ai-provider --provider anthropic --model claude-sonnet-4-6 --mode efficiency
docker exec waterwheel-agent config-ai-provider --provider openai --model gpt-5.4 --mode efficiency
docker exec waterwheel-agent config-ai-provider --provider gemini --model gemini-2.5-flash --mode efficiency
docker exec waterwheel-agent config-ai-provider --provider deepseek --model deepseek-v4-pro --mode efficiency
For provider-specific extras — an Ollama-hosted Gemma 4 base URL, or a
localized system prompt — use the interactive
config-agent command instead:
docker exec -it waterwheel-agent config-agent
After you save a provider mode, switching to a different provider (for example Anthropic → DeepSeek) requires creating a new container. You can still switch between modes of the same provider at any time. See the Provider Configuration Guide for recommended provider settings.
4. Verify Your Configuration
Run a dry run first to confirm everything is wired up correctly without consuming tokens.
docker exec -it waterwheel-agent run-qa --dry-run
5. Run Your QA Tasks
A sample test is baked into the image, so there is nothing to add before your first run. You can see what the agent will execute with:
docker exec -it waterwheel-agent manage-test-files list
When the dry run looks good, execute the tests in the tasks directory:
docker exec -it waterwheel-agent run-qa
Use upload-test-task to create a markdown
task from stdin, and upload-instruction-file
for instruction and config files. You can remove the bundled sample — or any
other task — with manage-test-files delete and manage-test-files clear. See
the Command Reference for all the options.
6. Check the Results
Print the contents of the latest test results.
docker exec -it waterwheel-agent check-test-result
For a detailed diagnostic report of the first failed test — including the test steps, agent log, and context — use:
docker exec -it waterwheel-agent get-failure-detail
Uninstallation
If you need to change your AI provider, uninstall the agent and reconfigure it from step 1. Removing the container also
discards its test tasks and results, so export anything you want to keep first — see
output-context-variables and
check-test-result.
docker rm -f waterwheel-agent
Next Steps
- Write Your First Test — write a test of your own, run it against your website, and read the failure report. Start here.
- Chain Tests Together — run several tests in order, control their dependencies, and pass values between them.
- Create Test Skills — describe a tricky interaction once and reuse it across tests instead of repeating the steps.
- Manage Test Tasks — the reference for front matter, flow fields, and test statuses.
- Command Reference — every container command, with all options.
- Run through Docker Compose — bring the agent up with your own instruction files, tasks, and configuration mounted from the host.
- Run through a code agent — pair Waterwheel with a code agent such as Claude Code for an autonomous test-and-fix loop.